Thursday, December 6, 2012

1999 GMC Sierra- Door Hinge pin and bushing replacement

When I bought this vehicle, I knew it had a few minor things wrong with it. I enjoy figuring out what's wrong and trying to fix it. When I test drove it, I could tell that there was something wrong with the door. It was hard to open and shut. I could tell that it wasn't lined up correctly with the strike bolt (or whatever it's called). Another issue was that when I drove it, even with the windows closed, it sounded like the drivers door window was open. But it was a pretty good deal and I figured that I could get it fixed and learn a bit in the process. 

I could tell that there was some issue with the hinges on the doors. The drivers door was way worse, but the passenger door was not right too. I started looking around on the internet and found that the hinge pins and bushings weren't designed that well on these vehicles. They tend to wear out easily. When they wear out, the door sags causing it to be misaligned and also causing the weatherstripping to not contact the door/jam as tightly as it should. That caused the wind noise. I'm sure on this vehicle the bushings wore out even quicker since it was in dusty conditions most of the time. 

There are all kinds of repair kits out there to get the job done. I wanted to have the best chance for success, so I didn't go after the cheapest fix. After comparing the options, I decided to go with the "Total Auto" hinge pin and bushing repair kit. They are probably the most expensive out of all of the different ones I looked at. They are also very easy to install. They have a nice video that shows you step by step how to do the repair. I watched it several times before I actually ordered the kits and tool needed. I didn't actually buy the kits directly from Total Auto. I purchased them from "Johnson Supply Company". Maybe it was me, but I couldn't find the basic kit they talked about in the video for $55 on the Total Auto website. All they offered were kits for $69 color matched to the vehicle. Since this truck is just a work truck, I didn't care if it matched the white, the silver it came in is fine, you don't even notice it unless you're specifically looking for it. 

Anyway, just so you know, the cost for the kits I needed and the tools was right at $277. Yes, not cheap, but if I had someone do it, it would have been at least double that amount, probably more. And I don't think that it would have been repairable again. With these kits, they guarantee if you use the tool they sell that you can repair the pins and bushings again. I probably won't have the truck that long however. 

What I've done is take color photos of the process. The video on Total Auto's website shows the whole thing, but video is not the best of quality. These pictures show things a bit better. I would watch the videos and then if you're not exactly sure you can look at the pics I posted. 

Without further delay, here are the photos with explanations: First, thought I'd show you the hinge pins before I removed them with the bushings. This is the passenger side upper hinge:
 101_2152 
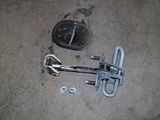
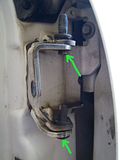
As you can see, they are quite dirty. This side was way cleaner than the drivers side was. Just so you know, my truck is a stripped down version, no power windows or power door locks. Everything is manual. So, more than likely your truck or SUV will be different. When I removed the door, I was lead to believe that they were extremely heavy. I found that they aren't that bad. I was able to remove and replace them just by lifting them off. I didn't need to use a jack or door stand (I don't have a door stand anyway). I will leave how to get the door off to you rather than suggest how to do it though. On the above picture, the two green arrows show where you are going to need to grind to get the pins to release. I used an air driven 3" cutoff wheel to cut/grind the bottoms of the hinge pins, here is a photo of mine: 
Photobucket 
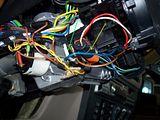
Prior to removing the door, you need to take off the door panel. Make sure you get off all of the screws holding the panel on, off. I missed one and it took me a while to figure out why it wasn't coming off. I would suggest that you get yourself a repair manual if you don't have one. The one I bought told me how to remove my panel, once I finally looked at it. Once the door panel is removed, you can get to any wiring that goes to the door. On my truck, I had a wire going to the speaker and to the door latch. I'm not quite sure why I had one going to the latch, I think it has something to do with dome light. These pictures show the wiring and speaker locations. Also other things to do with the door. 

This picture shows the wiring cover that goes from the jam to the door. The two green arrows show the tabs you need to push to release the cover from the door. I disconnected the wiring in the door and then released the cover (pushing the two tabs) and then pulled all of it out of the door:
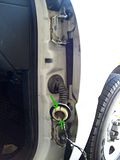
101_2154  


These pictures show how the wire to the door latch was routed: 

Photobucket 


Photobucket  


What the connector looked like and where it hooked:

DSCF0634  


The wire is routed about half way between my finger and the hole where the green arrow is, and it connects right about where I drew the red circle:
DSCF0633  


These pictures show the location of the door speaker and the clip you need to push to get it to release from the door:
Photobucket 


DSCF0639 


DSCF0638  


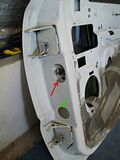
This picture shows the edge of the door. The red arrow shows where the door brake/stop attaches. The green arrow shows where the wiring cover attaches: 
101_2160  


This picture is of the door brake/stop. I made sure to clean it up and lube it using white lithium grease before re-installing it:
Photobucket 


This picture shows the door lock rod. If you have power door locks, I'm sure yours will be different. I went ahead and cleaned and lubed the points marked by the green arrows: 

DSCF0641


This last picture shows the new hinge pins and bushings installed:

Photobucket

I cleaned all of the grease, dirt and dust off of the door and jam.  If it hadn't been so dirty, the whole job would have taken me about an hour.  I spent about 2 1/2 hours on the job, start to finish.  The actual replacement of the hinge pins and bushings only took me about 20 minutes.

I would say that this job isn't for a novice, but someone who is mechanically inclined wouldn't have too much trouble doing it.  Good luck to you if you try this!
 

Tuesday, November 20, 2012

Cluster Removal on a 1999 GMC Sierra 1500 (new body style)

As I stated when I announced that I bought the 1999 GMC Sierra 1500 LS, this truck was owned by a pipeline company that works in the western US.  That turned out to be significant in the fact that I didn't think about where these types of vehicles probably spent much of their time.  Now I know that they spend a great deal of time on dirty, dusty roads probably in the middle of nowhere.  Even though the drive train seems to have been well taken care of, the rest of the vehicle needed quite a bit of TLC.  I actually didn't buy it directly from the pipeline company.  I bought it from a guy who had purchased it from the pipeline company.  Not sure how long he had it, but he obviously didn't care much about it other than keeping it running well.

I can't complain too much though, I got it for a fair price and it really does run great and everything on it works.

Since it was out on dirt roads much of the time, dust got everywhere.  The instrument cluster had a nice layer of fine dust covering the inside of the bezel and on the gauges.

Removal of the cluster is actually quite simple.  If you have a repair manual, I'm sure that they cover how to do it in there.  I bought a Haynes manual at my local auto parts place.  It tells you how to remove the cluster in there.  Only problem is that the pictures are small, black and white and very low resolution.  Hopefully the color pictures I will add here can help you out if you need to remove your cluster for any reason.

Here is how you do it: First off, you need to remove the bezel that covers all of the components of the dash. These first couple of pics show you what comes off. It's pretty simple, it just clips on the truck, no screws to remove or find. 


Photobucket
Photobucket

Somewhere around the edge of this bezel, you just need to grab hold of it and pull towards you.  I would suggest doing it a bit gingerly, don't get overly aggressive with it.  It you are careful, it should come out fairly easy.  To make getting it out easier, you need to do a couple of things.  First, tilt the steering wheel down as far as it will go.  Second, if you have an automatic transmission, shift the gear selector all the way down to the lowest gear.  You have to put the key in the ignition and turn it to be able to move the selector.  I would suggest that you disconnect the battery so you don't short anything out while removing the cluster.  Better to be safe than sorry.  As you are moving the bezel away from the dash, you have to manipulate it a bit to get it to clear the hazard light button, but it will get past it with no problem.

Once you have the bezel off, you can work on removing the cluster.  There are four 7mm bolt/screws that hold the cluster in place.  They are located one at each corner of the cluster.  Here are some pictures showing where, with the cluster in and out.

This picture shows the cluster still in place, couldn't get a picture with the cluster in showing all four screw locations, there is one in the lower right corner not visible.

Photobucket

This picture shows the cluster removed and the locations of the screws:
Photobucket

Once you have the cluster loose, you need to pull it out a bit and remove the wiring harness from the top of the cluster.  It can be a little sticky, just take your time and don't force it.  There are a couple of clips that lock it into place that you have to squeeze to release it from the receptacle.

I thought that I got a picture of the wiring harness, but apparently I didn't.  I did take a picture of the receptacle for the harness on the top of the cluster, here it is:
Photobucket

These last pics are of the clips that hold the clear plastic lens over the actual cluster.

These two are on the bottom of the cluster, if you're not sure, you can see two small black tabs sticking out from white square shapes.  (I normally draw lines pointing to what I'm describing, but my photo hosting site changed the way they do things and I haven't figured it out yet.)
Photobucket

This picture is of the top of the cluster and the four tabs that hold the clear plastic cover on the cluster.  They look like the bottom tabs:
Photobucket

Once you get the cluster opened up, you can clean it however you like.  Just be careful around the gauge needles.  If you're going to use some type of liquid cleaner, don't spray it directly on the cluster, spray it on a rag first and then wipe down the cluster.

Once you have cleaned or repaired your cluster, installation is reverse of removal.  

Hope this helps.  Good Luck. 


Monday, November 19, 2012

New Project

I recently bought a 1999 GMC Sierra 1500 LS to use for hauling and other odd jobs.  It was a fleet vehicle for a pipeline company in the western US.  It seems to have been well maintained mechanically, it runs nicely.  It has quite a few bumps and bruises to the body and a few minor things that I'm working on to get it a bit better.

I just finished up replacing the door hinge pins and bushings and removing and cleaning the instrument cluster.  I have taken pictures of these jobs and will shortly be publishing a write up about how I did it.  Perhaps these can assist you in doing the same thing.


Saturday, April 14, 2012

Why I will no longer patronize Tiger Direct

I know, I know, this is supposed to be a car repair blog.  But I figure since I get so many hits on it for car repair stuff, this post and my last one would do well here to get my message across.

In my last post "Biostar Sucks", I stated that I had put together a new computer for my Wife.  Shortly after doing that, my computer started acting up.  With my computer being nearly five years old and it acting up, I decided it was time to build a new one for me too.

I researched the components I wanted on several different sites.  Tiger Direct came up a bit better than the place I normally use (Newegg).  Tiger Direct's shipping is always slower that Newegg, but the price difference was worth it.

All of the stuff came within the designated shipping time and everything was in good shape.  I don't like Mail in Rebates.  However, Tiger Direct's process while tedious seems to be better than most.  Their rebate center seems to be organized and fair.  To be honest, I already received one of the rebates after only one month of waiting.  The others are still "processing".  I'm fairly confident that eventually I will get back all of the rebates I submitted.  Time will tell.

All of this leads us to why I won't buy stuff from Tiger Direct any longer.  A couple of weeks after getting the new computer together I received an email from them asking me to review all of the different components I purchased from them.  I went on a short trip we had planned, but did the reviews when I returned.  I was honest in my evaluations, so far everything I put in the new build is working well.  The items I bought that had MIR's I commented that the MIR's were a pain in the neck with no guarantee that you would get your money back.  Even though I think I will eventually get my money back, I believe a better way to get people to buy is to just discount the items up front.  I know why they do this though, it's to save money.  Most people won't go through the hassle of collecting all of the required documentation to get their rebates.  They can advertise that this product is less because it has a rebate and entice someone to buy it, knowing full well that most people won't do what needs to be done to receive the money.  Anyway, my comments were edited by Tiger Direct.  All of the references to the MIR's in my comments were removed.

To make a long story short, any company that can't take constructive criticism along with praise has an integrity problem and does not deserve my patronage.  I would recommend using other businesses for your electronics needs.

Monday, March 26, 2012

Biostar Sucks

I know, this is supposed to be a car repair blog.  Well, I decided to stray from the norm for a bit to tell about my experience with Biostar.

Biostar is a company that makes electronic gear.  I recently purchased a Motherboard made by Biostar for a computer I put together for my wife.  I've used their stuff for years.  I've had good luck with their products too.  This time not so good.

Two issues have happened with this purchase.  First, the computer I built has a habit of giving an error message when booting into the OS.  When doing so, occasionally a message will pop up that says something like "xxxx failed to shut down properly".  I changed out pretty much everything trying to locate the culprit and have come to the conclusion that it is the Motherboard.

The second issue I have with Biostar is that when I bought this Motherboard, it came with a Mail in Rebate offer.  Not one to pass up free money, I followed their instructions to the "T" and submitted everything in a timely manner.  It's been over 12 weeks now, and no rebate.  They state that it should take no longer than 10 weeks to receive the rebate.  I did some searching on the web about Biostar's practice with Mail in Rebates and found that they pretty much are crooks when it comes to honoring the Rebates.  

While I believe that my first issue could happen to any Motherboard manufacturer, a history of ignoring, throwing away or losing, etc, Mail in Rebates is bad and dishonest business practice and goes to the integrity of the company doing it.  It is for this reason that I will never buy another product from Biostar.

That's just my two cents on this subject.

Friday, February 24, 2012

My problem with Hyundai

Last year I bought a brand new Hyundai Sonata.  Below is a letter I recently wrote to them explaining my problems.  I sent it off around two weeks ago, still haven't heard anything from them, don't really expect to.  I would suggest you look for another brand if you're considering purchasing a Hyundai.

To Whom it May Concern,

On July 1, 2011, I purchased a Hyundai Sonata from the dealership in XXXXX, CA.  After a bit of negotiating, I was able to get it for what I believed to be a fair price.

I’m writing this letter to you to inform you why I’ve soured on Hyundai.

With the purchase of the vehicle, came a three month free trial of Sirius/XM radio.  While I didn’t really care if it came with the car or not, my wife and I tried it out.  We weren’t too impressed with the service.  My interaction with the sales representatives from Sirius/XM was very frustrating and troublesome.  They constantly harassed me at home by calling continually and bothering me.  I finally took one of their calls and had to just hang up the phone on them, they were very pushy and in my opinion, rude.  I know this has more to do with them than Hyundai, but your company is the one that decided to offer the three month free deal, so I hold you responsible.

Next came a couple of issues with the vehicle itself.  While on a trip from my home in XXXXX, CA to San Antonio, TX, I discovered that my speedometer was off by what I consider to be a large margin, about 2.8% or right at 40 miles in a 1340 mile one way trip.  While on this trip, we also got several warnings from the TPMS.  We had to stop several times to make sure we weren’t running on flat tires.

When we got home from this trip (we put on over 3000 miles), I brought the car in for it’s 7500 mile service.  I notified the Service Department of the issues and they told me they would check it out.  When the vehicle service was completed, I was told that nothing was going to be done about the speedometer since it was “within” specs.  According to the service manager, the engineers who figure all of that stuff out decided that the inaccuracy of the speedometer was acceptable to them.  I was also told that there was a wide spread problem with the TPMS on these cars and it might be to my advantage just to take the bulb out of the warning light.

The 2.8% inaccuracy in my speedometer is not acceptable to me.  Telling me to just take the bulb out of the dash to fix my TPMS problems is not acceptable either.  It is hard for me to believe in this day and age that a vehicle speedometer could be that far off right from the factory and you can’t get the TPMS to operate properly.

If in fact the problem with my speedometer is acceptable to Hyundai, if makes me wonder what else is going to be inaccurate or troublesome in the future and be acceptable to the company?

A couple of other issues that come to mind.  I always take good care of my vehicles.  I try my best to get them in for service in a timely manner.  I am doing this with the Sonata.  On my last oil change, I was promised a free car wash.  I called and made an appointment to have the oil changed.  Brought it in on time, and was told that the person who does the car washes was not there due to being out delivering parts.  Now, they told me I could wait, but when I asked, they said they didn’t know when he would return.  My time is worth something too.  I’m not going to wait around with no idea when I might get the car washed.  One last thing, every time I’ve brought the vehicle in for maintenance, they do a check of the tire pressures.  Every time I’ve brought the vehicle home, the tire pressures have been no where near the recommended pressures in the owners manual or printed on the drivers door “B” pillar.  This last time, I had the front left tire over inflated by 15 psi.  Apparently attention to detail is not common at this dealership service department.

When I purchased the vehicle, I gave my word to the Sales Manager that I would bring in my car there for service for at least a year because they were giving me such a “great deal”.  My word is my bond.  I planned on doing what I told him, but since they aren’t living up to their side of the deal, I don’t think I need to live up to my side any longer either.

I’m sure you can tell that I’m not a happy camper.  It is funny that a company that touts it’s vehicles so much refuses to stand behind them.

Thursday, February 2, 2012

Instrument Cluster removal on an E34 BMW

This will probably be my last post concerning the two E34 BMW's I've owned and written about here. My Mom just turned 86 recently and decided that she doesn't want to drive any longer. She had a ten year old car that only had 26K miles on it that was in really good shape. She gave it to me, hence I no longer need the 95 525i that I've owned for the past four years.

The 95 BMW's registration was up for renewal, so I needed to get it smogged. These old BMW's can put you through the wringer when you try to smog them. I did what I had to do last time I smogged this car, new air filter, new plugs and fresh oil change. Took it down to the Smog Test place after driving it hard on the freeway for about 30 minutes to get it nice and warm. The Smog guy got to it in about 10 minutes, but it failed. Didn't know it at the time, but the "Check Engine" light was not working. In California, that is an automatic fail even if you pass the rest of the test, which I didn't.

On my way home from the Smog Test, I decided to just get rid of the car. I had a much nicer, newer vehicle to use and really didn't care what I could get for it. I called around to some local wrecking yards and got someone to give me $500 sight unseen. This was on a Friday afternoon. I then started thinking about this buddy of mine who enjoys working on cars and is quite a good mechanic. I talked to him at Church on Sunday and he said he would buy it for $500.

He picked up the car this morning.

Before I handed it off to him, I decided to go ahead and at least change out the bulb for the "Check Engine" light. I figured while I was in there that I might as well replace the Gear Shift indicator light in the dash that burned out a while ago. I had some of the bulbs for the dash for over a year.

So, this post is mainly to give you some extra photos to look at above and beyond what the Bentley manual shows (their photos aren't always the best quality).

If you came here looking for a complete "how to" on how to remove your cluster, you won't find it here. The Bentley manual has excellent instructions on how to do this. I'm just enhancing the procedure a bit with some color pictures that are clearer. If you don't have a Bentley manual, I would suggest buying one.

If you look in the Bentley manual under Instrument cluster, removing and installing (Section 620-2) it gives you the step by step for removing it.

To remove the cluster, you have to remove the drivers air bag and the steering wheel. The air bag removal instructions are in section 721 and the steering removal instructions are in section 320 of the Bentley.

Just make sure you disconnect the battery before you attempt any of this.

These pictures added below should help you during the process:

Once you have the battery disconnected, you need to remove the air bag. You need to unplug the connector under the steering wheel column to do that. The picture in the Bentley isn't real clear. In this picture, the yellow arrow points to that connector. It has orange on it as stated in the manual. I took the air bag out of the 93 525i I had and the plug seemed to be a bit different that the 95 525i. As long as it had ORANGE on it, that will be the right plug. If you remove the plug denoted in the picture with the green arrow before the air bag plug it makes the entire process easier.


Photobucket

Once you have those plugs disconnected, you are ready to remove the air bag. Just follow the instructions in the Bentley. My air bag used the T27 Torx to remove it.

Once the air bag is free from the steering wheel, you need to remove the plugs attaching it to the steering wheel. It's fairly simple to figure out what you need to do at this point.

With the air bag completely removed from the steering wheel, you can remove the steering wheel. Again follow the instructions in the Bentley.

With the steering wheel gone, the cluster comes out fairly easy. Follow the instructions to get the cluster out. Make sure that you cover the steering column with a towel or thick rag. I did, but didn't secure it as well as I should have and it fell off. While I was working on the cluster, with the towel gone, I ended up scratching the bezel to the cluster.

This next series of pictures show the cluster coming out.

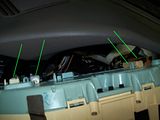
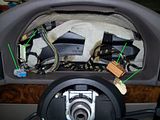
This one shows the cluster still attached to the cables. The four green lines show the location of the plugs that plug into the back of the cluster:


Photobucket

This picture shows the cluster removed and the four cables that were plugged into the cluster (see green lines):

Photobucket

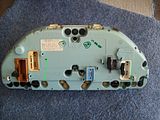
This pic shows the cluster out of the car. The picture is the back of the cluster. If you look at the plug sockets, you can see a small black lever to the left of each plug except for the second from the left. Those levers release the plug from the socket. This car is 17 years old and those levers are made of plastic. I tried my best to gently manipulate those levers, all but the one worked fine, the other one broke even though I was trying to do it as gently as possible.

Photobucket

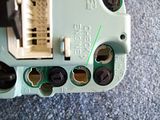
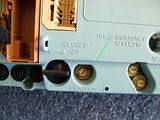
These last two pictures show the location of the bulbs that I needed to replace. The first one is the "Check Engine" light, as you can see, there was no bulb there, that's why it wasn't working. The second pic is where the Gear Shift indicator light bulb is located.

Photobucket Photobucket

Installation is reverse of removal. Just remember that you need to plug in those two plugs under the steering wheel. If you have any questions, leave me a comment or email me. Good Luck!