For the next few months, I was kept pretty busy at work and didn't have the time to fix this problem. I thought about it a few times when I heard the pop and crack when the door was opened. I started thinking about ways that I could fix it. Most of them included some kind of welding, but I don't weld.
A couple of days ago, I finally found the time to tackle the job. I came up with a repair that only cost me six dollars and I didn't have to weld anything.
Here is a picture of the problem before I started working on it:
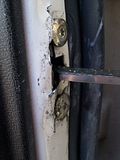
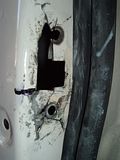
Here is what it looked like once I took off the door panel and could get to the door brake and remove it:
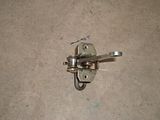
Picture of the removed door brake:
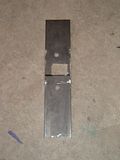
My idea for the repair was to get some metal and make a mounting plate for the door brake and then pop rivet it to the outside of the door to make the area stronger. I decided to get a piece of flat plate metal that was 1 1/2" wide and 1/8" thick. I had to buy a 36” long piece, but it only cost six dollars. After looking at what I needed to cover, I cut the metal 7” long. I took my time and laid it out the best I could and cut it and drilled it. I know it doesn't look very professional, but it works, here is a picture:
Here is a picture of the door brake mounted to the plate I made before I installed it, just to see if it fit properly:
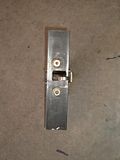
I didn't have any special tools other than my cordless drill and a jig saw with a metal cutting blade to do the drilling and cutting. I do have an old bench grinder that I used to smooth all the rough edges.
To be able to mount the door brake back on the door, I needed to remove most of the cracked and torn metal. Here is what it looked like once I did that:
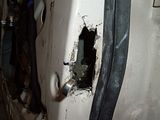
To get the metal out of the way, I used one of those hand held air operated cut off wheels. I initially tried using some tin snips, but the cut off wheel worked much faster. I left as much metal on the door as I could and still be able to get the door brake mounted. I wanted to leave the metal there to add some backing to the plate I made.
I did most of the work with the door still on the car. I figured out though that I wouldn't be able to drill the door jam for the pop rivets if I didn't remove the door. It only took me about 10 minutes to remove the door, I should have done that before I started this whole project and would suggest if you're planning on doing this to take the door off first. It makes everything much easier.
I ended up having to modify the shape of the plate to get it to lay flat and to avoid sharp corners. I rounded off all four corners. The upper corner towards the outside of the door I took more off so it would fit better. Once I was happy with the way it fit, I decided where I would drill the holes for the pop rivets. I put three on the top and four on the bottom mainly due to the shape of the door. I filed and ground down the remaining rough spots, sanded the plate and painted it to protect against rust.
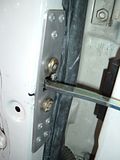
Once the paint was dry, I went to install it. This is where having the door off of the car really helped. I positioned the door brake where I needed it to be and found that some of the rubber weather stripping on the door was in the way. I used a utility knife to trim away just a bit of the weather stripping and then the plate laid perfectly flat. With it in the correct position, I then drilled all the pop rivet holes and installed them.
Here is a picture of the plate riveted in place with the door brake installed:
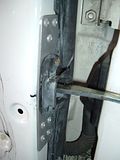
This last picture shows everything installed with the rubber boot in place:
That's it! I used the Bentley Manual for instructions on how to remove the door panel, how to remove the door brake and how to remove the door. While I was in the door, I lubed all of the door parts and the moving window parts that needed it. Done!